Monday, 11 April 2011

Maya Tutorials: Rendering with Mental Ray Week*2

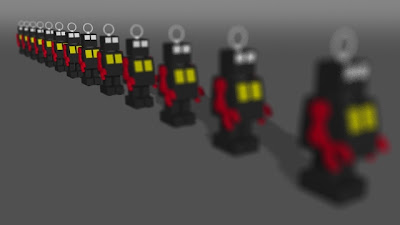
On this week, we were introduced to really interesting features in mental ray, that will help get the render desired. Motion Blur was the first that was shown to us, and despite the horrific render times the effects your are able to get with Motion Blur are unique, it is truly useful for motion characters or props, to give that extra hint of dynamism, instead of looking like a still object moving around.

Motion Blur
2D Motion Blur 


Final Motion Blur Shot


2D Motion Blur Progress


3D Motion Blur 

Final 3D Motion Blur Shot


3D Motion Blur Progress


Non- Deformations Motion Blur

Final Non- Deformed Motion Blur 


Non-Deformed Motion Blur Progress


Motion Blur Using Rasterizer

Lastly, but no less important, this tutorial, helped understand how to possibly reduce the render time, When using motion blur the objects will be moving at a certain, therefore a lot of detail doesn't need to exist. So by using the rasterizer option, instead of the Scanline, the render looks still similar but the render time was reduced by half a minute.

 Final Motion Blur Rasterizer Shot

Motion Blur with Rasterizer Progress


The second part of the  mental ray tutorials this week was helping to understand depth of field, this is extremely useful, as it focus on certain things that could be missed at first. 

Depth of Field

Depth of Field Progress Shots


Lens Bokeh Effect


Maya Tutorials: Rendering with Mental Ray Week*1

This week we were introduced properly to Mental Ray, this far most of the things rendered came out of the Maya software render.
Mental Ray works differently, and with better results.
here we were introduced to the shadow corrections and optimisation, which allows to test your scenes so they can possibly render faster.

Mental Ray Shadows

Final


Maya Software

Switching to Mental Ray

Shadow Softness Default

Shadow Softness 15


Mental Ray Optimisation
This tutorial to me was really problematic, first I had to reconnect all the textures from the source images. And then after exhaustively trying to find the Output menu on my mac, I wasnt able to. However, I was able to get the console giving me the information about the render but not the useful one.  So I wrote the process of my renders.

Final- Mental Ray Samples 1

 Mental Ray Samples 2

BSP Depth Diagnose


Render 1
2.36
BSP 10
BSP Depth 40


Render 2
2.18
BSP Size 10
BSP Depth 50


Render 3
2.19
BSP Size 10
BSP Depth 45


Render 4
2.07
BSP Size 10
BSP Depth 48


Render 5
2.25
BSP Size 10
BSP Depth 60


Render 4
Sampling 1
1.47
BSP Size 10
BSP Depth 48


Maya Tutorials: Introduction to Normal Maps

Here we were introduced to normal maps, a more recent method to get bump values on your model, since this tutorial I have explored even further this method and wrote a technical paper about it. Definitely, something to take in consideration for the future projects.


                               Mental Ray                                          Maya Software ( it doesn't work)


2nd Example

Mac does not support the Nvidia plugin for Photoshop to convert Normal Maps, luckily the program nDo enabled me to do the same thing.

Friday, 8 April 2011

Transcription: The Music of Erich Zann Submission Files

Yesterday was the last of the Transcription project, so I presented my work. It consisted in the final animatic to understand the story, the animation tests, which was a excerpt of animation I have done so far and walk cycles, and the Animation shots, renders that were taken out of the final animation.
My work was fully supported with the 'Art of' Document, that enables anybody to understand the process behind what I have done for the past 10 weeks.
Although, yesterday it was the last day of the project, it's certainly not the last day of Erich Zann, as I am excited to finish this piece.

Without further Ado here is what I presented, as well as the rest of the submission files.

Hope you like it.

Final Animatic


Animation Tests


Animation Shots


(I'm sorry for the quality, but I guess Scbrid doesnt like high res) 


Art of The Music of the Erich Zann


Demo Reel Shot 


Technical Paper- Texturing a Model Using Sculpting and Normal Maps


DVD and Disc Template


Logo and Branding 


Business Card


The business card is not final, I have done this one in the beginning of the project, and I found out  that It as to be improved. 

Saturday, 2 April 2011

transcription: Rue D'Auseil Final Model and Texture

I am getting closer and closer of finishing the set modelling, here is a quick update from the previously posted Rue D'Auseil model. I have added the lodge house, the wall and some stairs and lamps here and there. What is left is a quick close up model of the door opened and the interior set.


Texture Maps


For the texture maps, I did another few for the buildings.

Transcription: A Quick Update on Environment Modelling/ Texturing

Throughout the day I have been modelling and texturing the last scenario for my animation, the Rue D' Auseil. I used the same style for the street and I plan to finish it tomorrow.


I will update tomorrow with the final model, and I will begin to sort out things for the final presentation.

Friday, 1 April 2011

Transcription: Staircase Modelled and Textured

Lately, I have rampaging through set modelling and texturing. and I forgot how time consuming it can be. Like everything else, and as John Lasseter once said, " In CG nothing comes for free".  so I have to model everything in the scene, and then texture it.
Today, I have moved onto modelling the Rue D'Auseil, and texture it. Before I post that here is a quick update on the the staircase environment and texture.


Staircase Model


Staircase Textured


Texture Maps: