After presenting my animation in last week's crit, I received good feedback, although Phil pointed some things that should be tweaked. Indeed, I am not fully pleased with my animation, not only I had some technical problems, with after effects in adding the backgrounds, and actually working with it, but also I feel the editing needs to be slightly changed, and add some more sound effects, this would allow my animation to be more genre based. So to clean my conscience, I decided on these holidays to take on the animation, and actually develop in terms of editing, sound effects and special effects. This will help me understand where I did go wrong, that I know already pretty much after the feedback, but also will help me to better understand genre based animations and the rules they obey.
After all, it was a really good crit, as the Commissioner Peter Klappa, actually liked my approach to the topic.
Also, Uni is over for this year, I guess I will have the so deserved holidays, and actually relax for a few days, then get back to work, though this time the deadline is ages away.
Guys, see you all in September for the 2nd phase!
P.S.- I will be updating the blog regularly, with my progress on the summer project and other personal projects, tutorials, or any artworks.

Monday, 31 May 2010
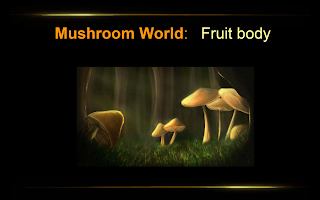
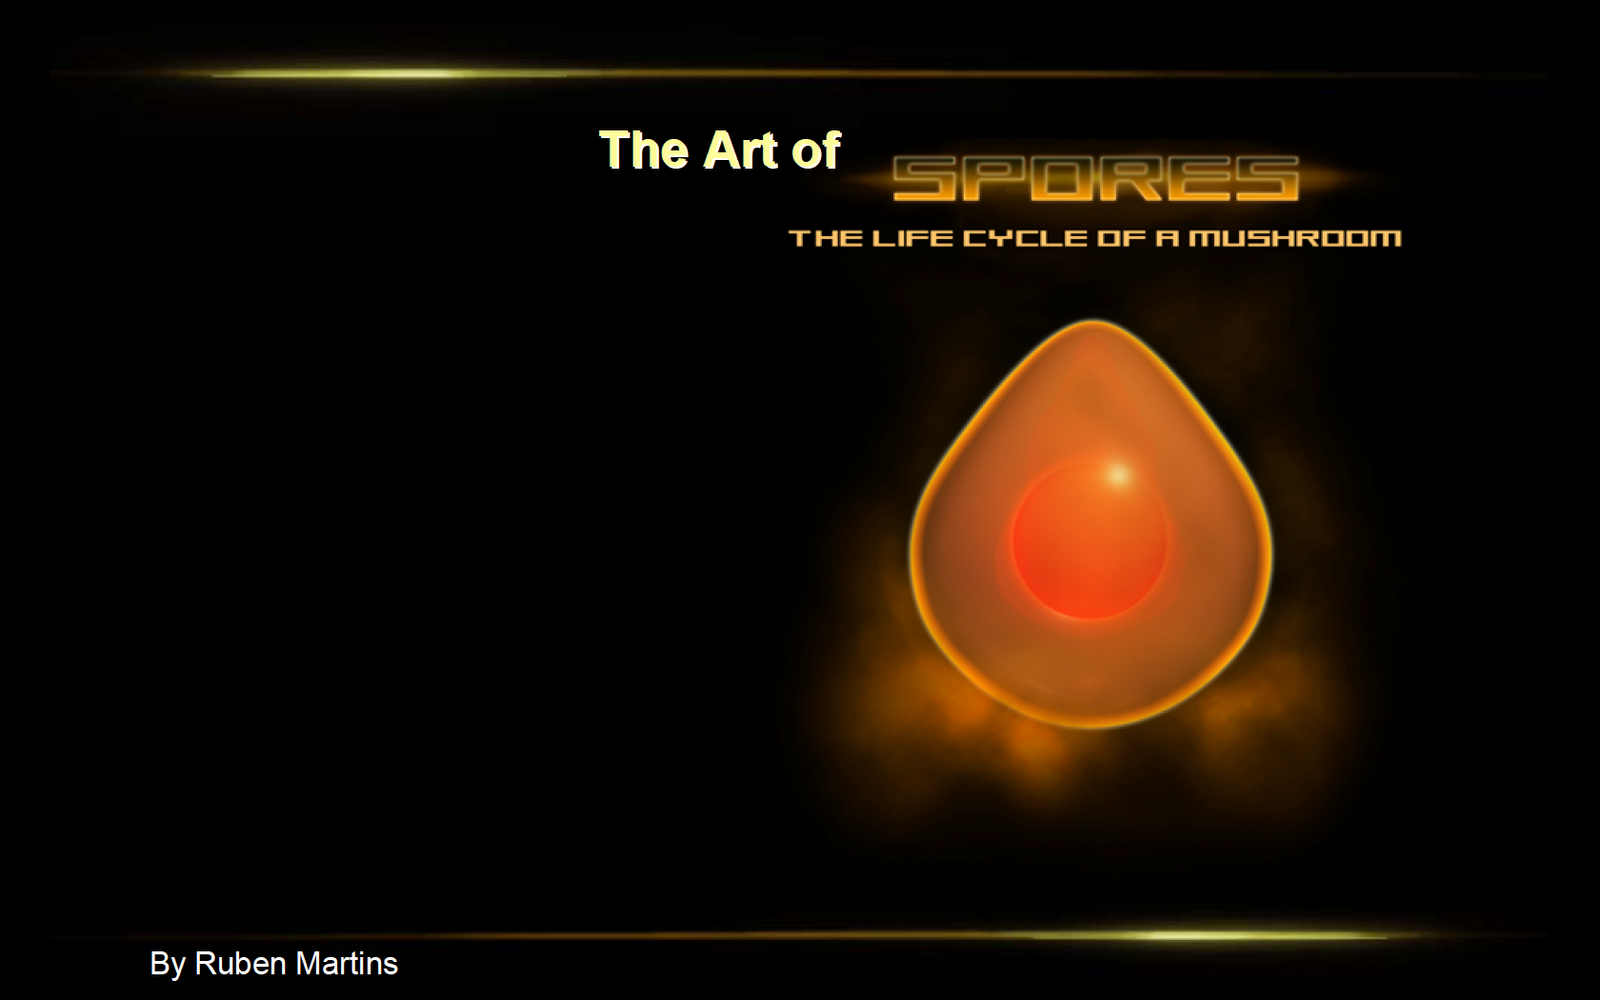
Unit 6- Spores- The Making OF
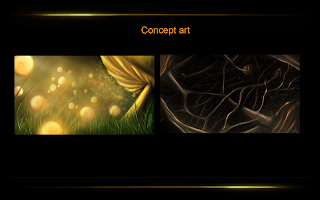
With this unit we were asked to produce a 'making of' of our animation, archiving all our development, research, concepts and the actual final animation renders.
here is what I put together, although is not perfect it has quite a good chunk of information about my animation, the only thing is that I forgot to put the storyboards, as I was planning to add some specific crucial shots, but time didnt let me :(

here is what I put together, although is not perfect it has quite a good chunk of information about my animation, the only thing is that I forgot to put the storyboards, as I was planning to add some specific crucial shots, but time didnt let me :(


Unit 6 - Spores - Final Animation
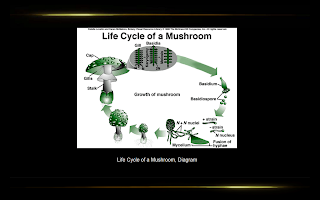
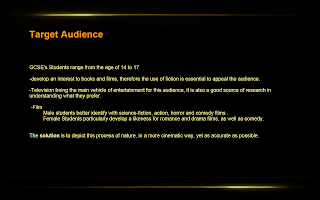
Here is my final animation for unit 6, having chosen an audience, GCSE's levels, this is my cinematic approach to them, depicting the whole mushroom life cycle.
I have to say im quite pleased for what I could achieve in only 5 weeks. bearing in mind that it was my first CG animation.
P.S. the actual format is 16:9, but Youtube compressed in a 4:3 format, weird :S
I have to say im quite pleased for what I could achieve in only 5 weeks. bearing in mind that it was my first CG animation.
P.S. the actual format is 16:9, but Youtube compressed in a 4:3 format, weird :S
Sunday, 30 May 2010
Unit 6- Animation Final Renders
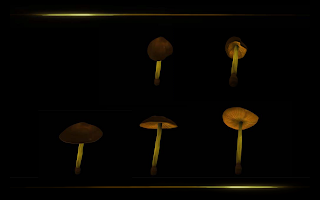
Here are some of the shots featuring in my animation, they are already full renders, so the lighting and texture is already set. Also they are ready to be composted with a painted backdrop.
Mycelium
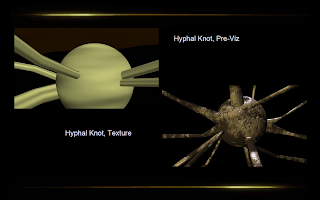
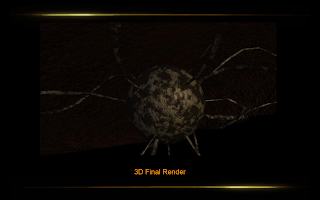
Hyphal knot
Dispersion of the Spores
Mycelium

Hyphal knot

Dispersion of the Spores


Unit 6- Animation Pre-Vis
Here is the rest of the pre-viz, I used on my animation, although they are being uploaded a bit late, I used them to help me create the actually animation. While the journey inside the gills showing the basidias, was the starting point for my final animation, the Kariogamy and Meiosis pre-viz were used in After Effects, to create a glow look and composite with the final render.
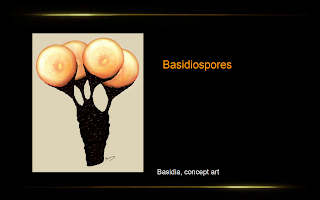
Pre-Viz Basidia
Kariogamy and Meiosis
Pre-Viz Basidia
Kariogamy and Meiosis
Thursday, 27 May 2010
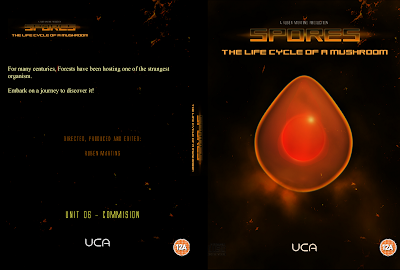
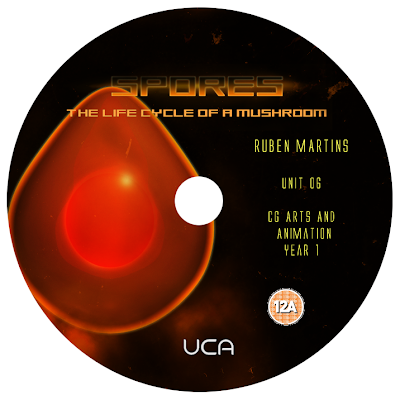
Unit 6- CD/DVD Template
It has been a while since my last post, although, I havent been here much lately, it only means im with a lot of work, which is finishing pretty soon :). I have already the other Pre-viz videos, however I am concentrating of having the animation done 1st and then I update the blog with the respective progress.
which hopefully looks promising.
I took some time to do the CD/DVD Template for this unit, with Sci-Fi in mind, I researched a couple of DVD covers and posters, such as Alien, Armageddon and Matrix.
So here is the design:
More updates coming shortly.
which hopefully looks promising.
I took some time to do the CD/DVD Template for this unit, with Sci-Fi in mind, I researched a couple of DVD covers and posters, such as Alien, Armageddon and Matrix.
So here is the design:


More updates coming shortly.
Monday, 24 May 2010
Unit 6- Mycelium Growth, Final Pre-viz
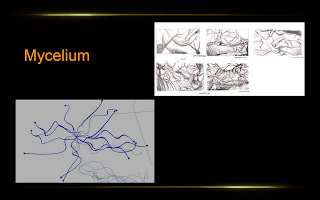
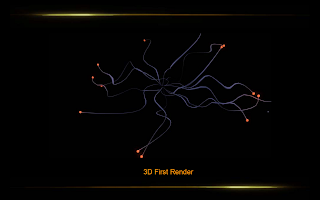
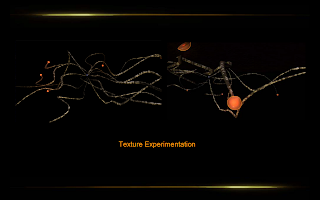
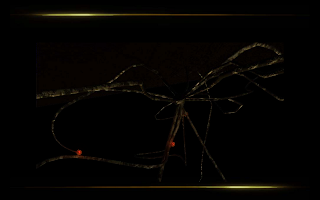
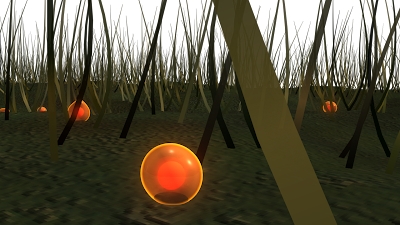
At this stage, i'm just putting everything I have together and tweak it, so It can also be my animation. After creating the Mycelium Pre-viz, I decided to add more threads and more spores to populate the scene. Also, I applied some dirty and volumetric textures.
Final Animation Mycelium
Also, I took some render with no proper light set onto the scene, just to check the textures.

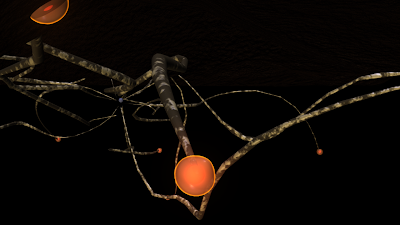
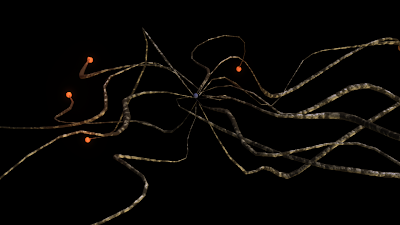
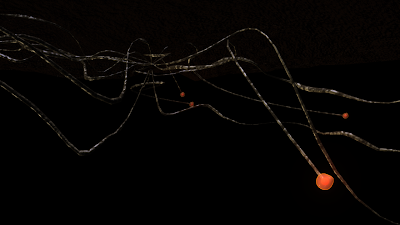
Although, I have a little to do, animation mainly, i'm planning to finish maya work until tomorrow and start render by then.
Pre-Viz Mycelium
Final Animation Mycelium
Also, I took some render with no proper light set onto the scene, just to check the textures.


Although, I have a little to do, animation mainly, i'm planning to finish maya work until tomorrow and start render by then.
Sunday, 23 May 2010
Unit 6- Cinnamon Cortinarius Renders
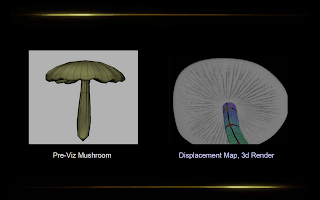
Yesterday, I textured the main structure of my animation the mushroom. for it I decided to go for a realistic type of texture, with a slightly dramatic approach , adding extra cavities and gills in the actual mushroom, to not only look like a mushroom, but also to resemble to an alien spaceship.
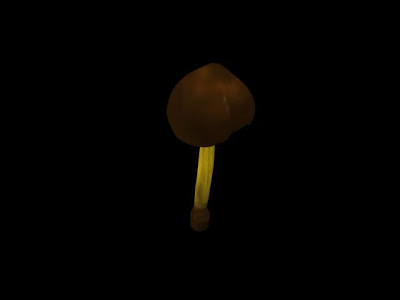
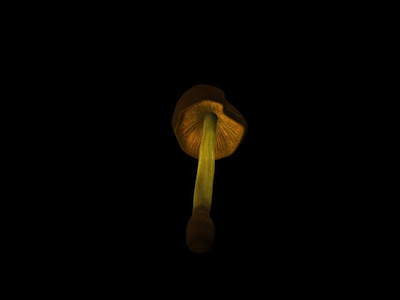
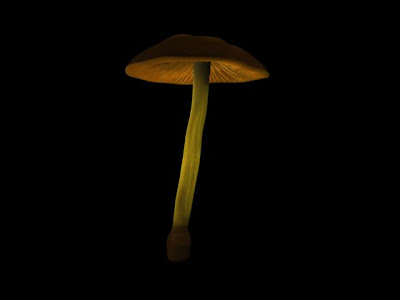
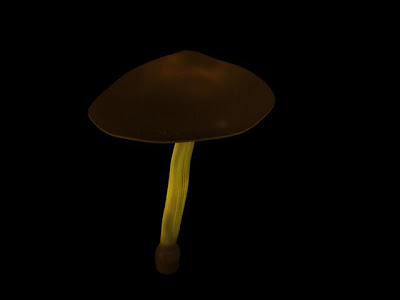
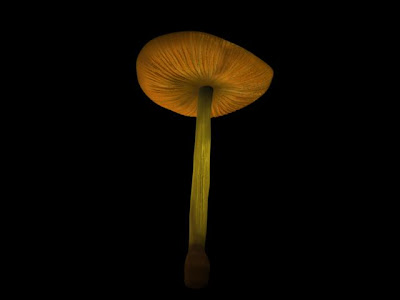
For it I painted my own texture referencing from real life photographs, create a colour map, bump and spec, also to form the gills I applied a displacement map.
Also I took a quick render of my 1 scene, although the background is quite dark, I will slightly light it up as I want full contrast between dark and white (or in this case the spore.) i want to use the negative space in my favor.

Saturday, 22 May 2010
Unit 6- Mushroom Growth For Final Animation
Today, I spoke to Alan and he helped me with my "shopping list" ( all the questions I had). He directed me to actual rig and skin a mushroom and, and create a growth out of it, despite taking more time than only using a series of blendshapes, it actually works better, as you can apply mush more variation.
Here's is the new and final version to add to my animation, I added a quite dramatic jiggle in the end so when the camera is close it will emphasize its strength on growth.
Here's is the new and final version to add to my animation, I added a quite dramatic jiggle in the end so when the camera is close it will emphasize its strength on growth.
Friday, 21 May 2010
Unit 6- Mushrrom Gills Pre-viz
It is the shot following the one where the camera will travel inside the gills, for these pre-vis is that a camera movement starts slow and then goes faster, for my actual animation the beggining part will cross dissolve with the last shot.
Thursday, 20 May 2010
Unit 6 Mushroom Growth pre-viz
Today, I spent my day polishing the 1st scene until it is almost ready for rendering ( just needs some lighting, which I will ask Alan tomorrow for some help). Also I have been battling maya to get the growth of the mushroom right, not only the pre-viz mesh but also the camera movement. although in the pre-viz the camera is still in the beginning, it wont be when i put everything together also the rest of the earthquake will be seen. the only thing i have to solve is the time between going from underground to the top, I may have to dig a hole :P
now into the last steps of the pre-viz ( the easier ones). and then just tweak things up :)
now into the last steps of the pre-viz ( the easier ones). and then just tweak things up :)
Wednesday, 19 May 2010
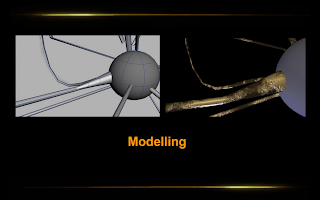
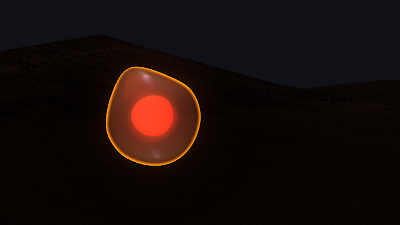
Unit 6- Spore- Wireframe and Final Render
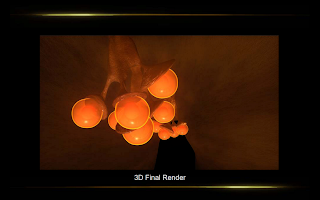
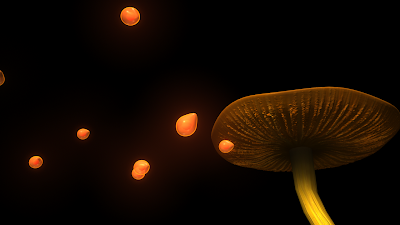
Today , I decided to take a easier night and start to model some stuff, apart from some trees I did for my 1sr scene, I also model a simple spore, and applied some shaders to it.
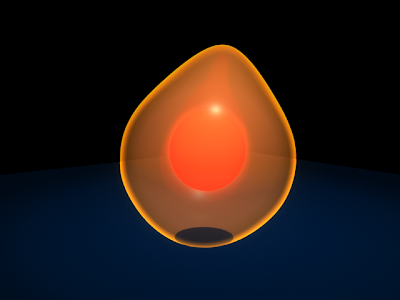
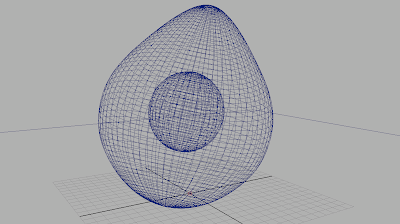
I really like the core of the spore, resembles to fire. Therefore connected to the idea that comets are based in heating. also the really glowing core can be distinguished in the dark.


I really like the core of the spore, resembles to fire. Therefore connected to the idea that comets are based in heating. also the really glowing core can be distinguished in the dark.
Unit 6- Mycelium Pre-viz *4
After some shared thoughts, I tweaked this scene, so the camera doesnt immediately stop, also to mentioned is that this camera will follow the growth from here forward. this time, I added a small push to the camera to pan- in when the knot grows. Also changed a little bit the camera position so the knot looks huge in comparison to the camera imposing towards the spectator.
Tuesday, 18 May 2010
Unit 6- Mycelium Pre-viz *3
After the feedback pointing out some minor changes I should do to this scene, I quickly changed it and I can say it is working much better, tilt upwards of the camera really creates the sense of greatness and vastness. Also good to mention more hyphae will connect the mycelium on the back part of the model
Unit 6- Mycelium Pre-viz *2
After, looking my previous pre-viz, of the mycelium, I decided that the middle part of it was quite slow, so add sped it up a bit to create more dynamism. Also, I put a more controlled camera, that leaves the mycelium a bit earlier and flows.
Unit 6- Mycelium Pre-viz
After being happy with my intro after a few tries, I decided to move on and block out the rest of my pre-viz, here is the spores germination and the mycelium growth. For this scene I want the camera to follow the bigger hyphae as it grows and later leave it and just move towards where the hyphal knot will be formed. This scene just needs a few tweaks, mainly controlling the camera and correcting some glitches that may occur.
Also I inserted more spores,but they are not shown in the intial camera otherwise it wouldnt look logical in comparison with the previous scene.
Also I inserted more spores,but they are not shown in the intial camera otherwise it wouldnt look logical in comparison with the previous scene.
Unit 6- Spores Arriving Pre-vis *4
After receiving some feedback on the previous pre-vis, I decided to take the advice and create something rather simpler and effective. Taking in consideration the arrival of an UFO to earth, I decided to isolate the arrival into a dark background, however on the animation it will have the moonlighting and the shadows from trees in a really dark environment.
I just hope, i'm getting closer to what I pretend.
I just hope, i'm getting closer to what I pretend.
Monday, 17 May 2010
Unit 6- Spores Arriving Pre-vis *3
After today going to uni and have a good talk with Phil, He opened my eyes to what actually i'm trying to depict, a sci-fi Invasion film inside the life cycle of the mushroom, so all the camera work and all the actual animation should contribute for it. Once again, Phil gave me an eye opener, and I was able to see what was going wrong with my 2 previous pre-viz.
So after the talk, I rushed home and redid the pre-vis, by changing the camera movement and position, I created a more mysterious and dynamic scene therefore think i'm going the right way with it.
Also, the new episodes (Pre-viz) will be delivered later today I hope :) If Maya lets me.
So after the talk, I rushed home and redid the pre-vis, by changing the camera movement and position, I created a more mysterious and dynamic scene therefore think i'm going the right way with it.
Also, the new episodes (Pre-viz) will be delivered later today I hope :) If Maya lets me.
Unit 6- Spores Arriving Pre-vis *2
After looking at some feedback in the previous version, I decided to redo it, add some more control to the camera, I agree that It is nothing worse than a frenetic camera, so this time I added a curve and slide the camera on it.
I think It is looking better, though minor tweaks will be needed
I think It is looking better, though minor tweaks will be needed
Sunday, 16 May 2010
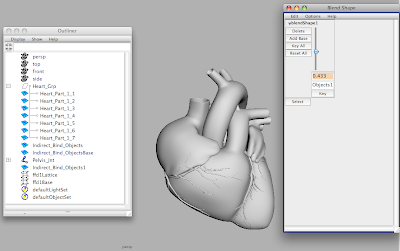
Maya Tutorial: Jiggle Deformers
Tutorial exploring other type of deformer, the jiggle deformer. It allows to create a more accurate and alive animation.
Jiggle Deformers- Head
Jiggle Deformers- Heart
Jiggle Deformers- Head
Jiggle Deformers- Heart

Maya Tutorials: 3D Felix- 3D Camera
Here is a quick tutorial, exploring the use of 3D in Maya, yes I know lately has been used in almost every film, to create an amazing experience, so nothing better to understand how Maya can also create it.
3D Felix

( It only works with red/blue glasses)
3D Felix

( It only works with red/blue glasses)
Unit 6- Spores Arriving Pre-vis
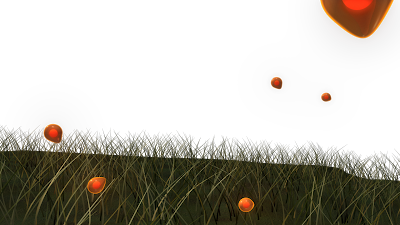
I decided to do the pre-vis in separate block, or videos, so if needs minor tweaks I don't have to open an huge file. Anyway, these part of the pre-vis, is the first scene of the actual animation where the spores are first dispersed ( without actually seeing what dispersed them), I started by establishing the environment, and then when the spores cross the camera, they are followed w/ the camera focusing on 1.
Although it is there a backdrop, it is not the final one, the final will show a dark forest where the moonlight will cast on the caps of the mushroom.
Also I'll update the blog with the videos of the previs, and then edit into the final previs video.
Although it is there a backdrop, it is not the final one, the final will show a dark forest where the moonlight will cast on the caps of the mushroom.
Also I'll update the blog with the videos of the previs, and then edit into the final previs video.
Saturday, 15 May 2010
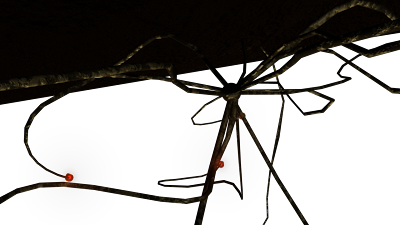
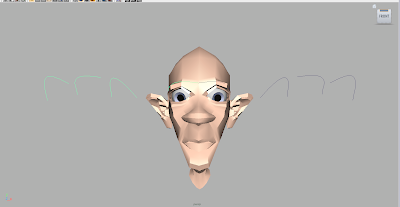
Maya Tutorials: Wire Deformers
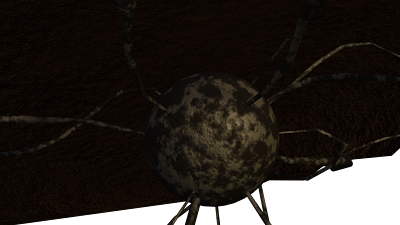
This tutorials explored the use of wire deformers to actual model, possible modifications of a face, such as a lift of a eye brow, etc. But also it showed how to create an actual animated alien/spider under a carpet without having the actual model.
These tutorials are really helpful when modelling our animation or actually animate something in a easier way.
Head Model Wire Deformers
Animation Wire Deformers
These tutorials are really helpful when modelling our animation or actually animate something in a easier way.
Head Model Wire Deformers


Animation Wire Deformers
Unit 6- Mushroom Growth Pre-Viz Exercise 1
I decided after doing some tutorials to actually try to get some animation and modelling done with blend shapes, so I took on the mushroom and start to do its growth, despite the need of a lot of refinement, it was good to start with something.
Friday, 14 May 2010
Maya Tutorials: Skinning Arm *1
The Introduction to skinning, I would say it is a long process but worth it in the end and fundamental if you want to animate a character. Although, It took some time doing it, I understood the process of distributing the weights by doing it in every finger.
After Effects Tutorial Session 2
Today, we were presented to numerous possibilities again to work with after effects, allowing to take our animation 1 level higher, but also to cut in some time. For the exercise part of the session, we were asked to take on our animatic and actually play around with the camera or with the objects.
I decided to do the 1 scene of my animation where the alien spores firstly contact the soil ready to fertilize and spread.
The addition of more frames really pays it justice and allows a better understanding of time. :)
I decided to do the 1 scene of my animation where the alien spores firstly contact the soil ready to fertilize and spread.
Being new to after effects, I decided to take time exploring the different features, effects, etc.
I can affirmatively say that when I gain more experience with the program, I will create animatics with it, as it allows a more fliud and accurate sense of the animation itself.
Here is the actual Storyboard animatic for a comparison.
I can affirmatively say that when I gain more experience with the program, I will create animatics with it, as it allows a more fliud and accurate sense of the animation itself.
Here is the actual Storyboard animatic for a comparison.
The addition of more frames really pays it justice and allows a better understanding of time. :)
Thursday, 13 May 2010
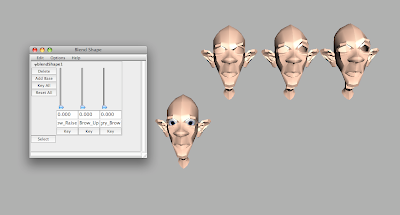
Maya Tutorials: Blendshapes Week*1
Here is the introduction tutorials into the world of organic modelling using blend shapes, ths tutorials will be fundamental to create the environments in our animations therefore I decided to tackle them straight away before I do the Pre-Viz. With the purpose to get a better understanding on the new functions of Maya modelling.
After a great explanation by Alan, in this subject, I started the tutorials , I found them straight forward to understand and do. Also on the mirroring shapes one I decided to actually do only one looking at the tutorial, and apply the same technique to the others, just to build a bit of self-knowledge.
Blendshapes Operation Order
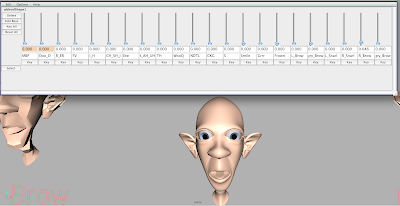
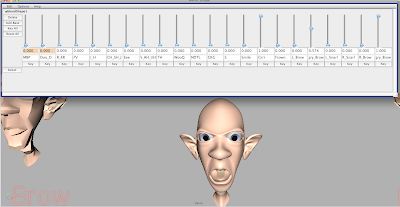
Positive/ Negative Corrective Blendshapes
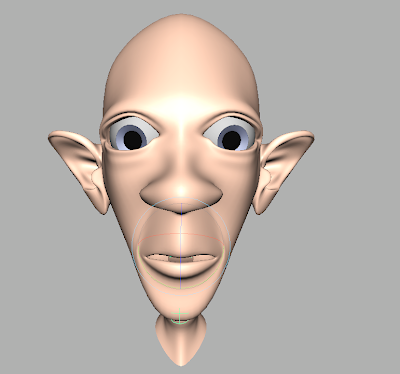

Blendshapes Mirroring
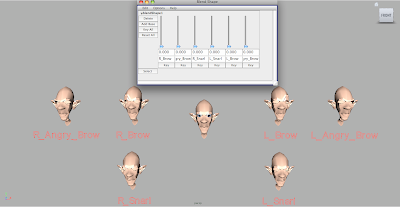

Subscribe to:
Posts (Atom)